
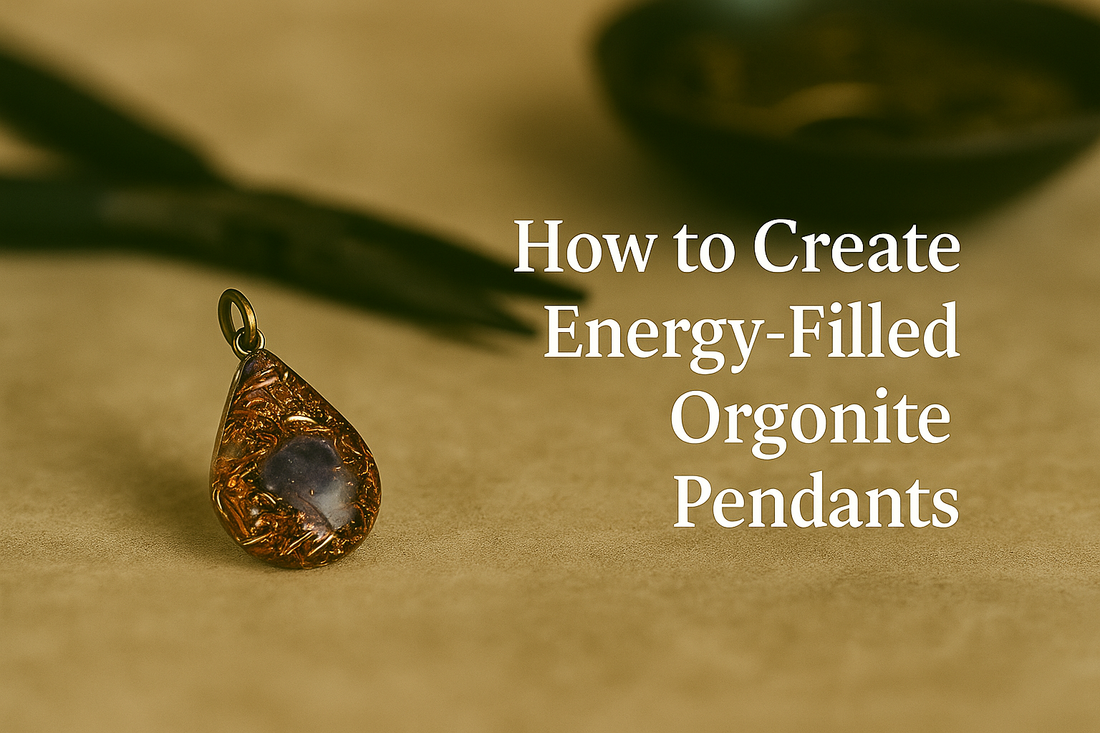
How to create energy-filled orgonite pendants
This practical tutorial shows how to craft orgonite pendants by hand using clear casting resin, clean metal shavings, crystal chips, and a small copper coil or spiral insert. You will plan a layered composition for visual balance, prepare molds, mix resin without bubbles, place metal and crystal inclusions accurately, pour in disciplined thin layers, cure safely, demold and flatten backs, sand and polish to a glass finish, and attach bails or drill-and-ring hardware for comfortable wear. Eight inline diagrams illustrate each critical stage exactly where you’ll use them.
Materials, safety, and workspace preparation
Organite-style pendants usually combine a clear resin matrix with metal shavings and small crystals, sometimes adding a tiny copper coil. A clean workspace and safe handling of resin ensure consistent, bubble-free results.
Core materials and why they matter
- Clear casting resin (epoxy or UV-stable polyurethane): clarity and low-bubble pour for optical depth.
- Metal shavings (aluminum, brass, copper): fine and clean; wash and dry if oily to prevent clouding.
- Crystal chips (e.g., clear quartz): small, clean, and dry; avoid dust and grit.
- Copper wire (0.6–1.0 mm / 22–19 ga): for a small spiral or inlay coil.
- Jewelry hardware: glue-on bails, jump rings, chain or cord.
Safety setup
- Ventilate the area; wear nitrile gloves and a respirator rated for organic vapors if recommended by your resin manufacturer.
- Keep food/drinks away; protect surfaces with a silicone mat.
- Warm resin bottles in a water bath (sealed) to reduce viscosity and bubbles.
Choosing pendant shapes, sizes, and balanced thickness
Comfort and weight come from smart dimensions. A comfortable pendant is typically 25–40 mm tall with a thickness around 5–8 mm depending on the resin type and load of inclusions. Plan a soft back edge or a slight dome for skin comfort.
Shape and thickness guidelines
| Shape | Size (typical) | Thickness | Notes |
|---|---|---|---|
| Round | Ø 28–34 mm | 5–7 mm | Classic; easy to center a coil |
| Teardrop | 30–40 mm tall | 6–8 mm | Elegant; mind bail alignment |
| Hexagon | 25–32 mm | 5–7 mm | Crisp edges; de-mold carefully |
Layer design: how to arrange metal, crystal, and coil for clarity
A clear composition improves both looks and durability. Keep the bottom layer thin for a crisp “window,” arrange fine metal evenly, then seat crystal chips where they read cleanly. If you include a copper coil or spiral, center it on the visual axis and fix in place between thin pours.
Balanced composition rules
- Use fine metal shavings for uniform density; avoid large, jagged chunks near edges.
- Stage crystal chips in the upper-middle layer to “float” without protruding.
- Place the coil flat and centered—use a toothpick dab of partially cured resin as tack if needed.
Winding a neat copper coil or spiral insert
A small copper spiral reads clearly in a transparent matrix. Wind gently and keep coils flat so they don’t “tilt” inside the resin. Size the outer diameter at 10–16 mm for a 28–34 mm round pendant.
Coil winding steps
- Cut 10–15 cm of 0.6–0.8 mm copper wire.
- Anchor the tip against round-nose pliers; turn to form a tight center.
- Transfer to a dowel (10–14 mm) to keep turns even; wind 4–6 flat turns.
- Clip tail; gently press the spiral flat on a steel block with a nylon hammer.
Quick sizing reference
| Pendant Ø | Coil Ø | Wire gauge | Turns |
|---|---|---|---|
| 28–30 mm | 10–12 mm | 0.6–0.8 mm | 4–5 |
| 32–34 mm | 12–16 mm | 0.8–1.0 mm | 5–6 |
Mixing clear resin: ratios, temperature, and bubble control
Clarity starts in the cup. Follow your resin’s mix ratio precisely and stir slowly to minimize micro-bubbles. Warmer resin flows better but cures faster—balance pot life and pour windows.
Mixing sequence
- Pre-warm sealed bottles in a lukewarm water bath for 5–10 minutes.
- Weigh parts accurately on a digital scale (per manufacturer ratio).
- Stir in a figure-eight motion for 2–3 minutes, scraping sides and bottom.
- Rest 2–3 minutes to allow bubbles to rise; briefly pass warm air to coax bubbles (no open flame).
Resin quick reference
| Resin type | Mix ratio (example) | Working time | Demold time | Notes |
|---|---|---|---|---|
| Epoxy (jewelry) | 1:1 by volume | 25–45 min | 12–24 h | Low odor; polishable |
| PU (UV-stable) | 2:1 by weight | 10–20 min | 1–3 h | Fast; sensitive to humidity |
Pour plan: thin pours, staged inclusions, and clean edges
Thin layers prevent heat spikes and reduce bubble traps around inclusions. Pre-arrange metal and crystal amounts on parchment so you can drop them in calmly without overloading the mold.
Layer-by-layer pouring
- Base window: pour ~1–2 mm of clear; coax bubbles; partial cure until gel-like.
- Metal layer: sprinkle fine shavings lightly; add a wisp of resin to lock them.
- Crystal layer: place chips with tweezers; ensure they sit below final surface.
- Coil set: lay the flat spiral; add a veil of resin to tack.
- Cap: pour to final height; skim flame-free heat to release bubbles.
Placement tips
- Keep inclusions 1–2 mm away from walls and top to avoid surface break-through.
- If inclusions float, wait for a thicker gel stage or reduce pour height.
Curing, demolding, and back-face refinement
Follow your resin’s cure schedule. Avoid moving molds during early cure to keep layers flat. Once fully cured, demold by gently peeling the silicone away. Lightly sand the back to flatten and add a soft back bevel.
Demold and back finish
- Press the mold underside to release air; flex corners to start the peel.
- Wet-sand the back on a flat plate: 600 → 800 → 1200 grit.
- Soften the back edge with 1200 grit for skin comfort.
Common curing issues
- Tacky surface: off-ratio or cold cure; post-cure in a warm room, then re-sand and polish.
- Warping: layers too thick or hot; use thinner pours and stable temperature.
Sanding, polishing, and restoring glass-like clarity
A disciplined grit ladder restores and elevates clarity. Keep everything wet, rinse between grits, and finish with a plastic-safe polish or a fine buffing compound.
Recommended finishing ladder
| Stage | Grit / tool | Goal | Tip |
|---|---|---|---|
| Level | 600–800 | Flatten back; remove mold lines | Use a flat plate under paper |
| Refine | 1000–1500 | Close scratches | Light, even strokes |
| Pre-polish | 2000–3000 | Silky sheen | Rinse slurry often |
| Polish | Plastic polish / compound | Glass-like clarity | Soft pad, low pressure |
Attaching bails, drilling, and assembly on chain or cord
Hardware must be secure and smooth. You can glue a bail to a flat, polished back, or drill a clean hole and use a jump ring. For glue-on bails, degrease surfaces and apply a minimal, high-strength adhesive. For drilled holes, use a sharp bit and back the exit with wood to avoid chips.
Hardware options
- Glue-on bail: flush pad with minimal adhesive; align along the visual centerline.
- Drilled-through hole: 1.8–2.5 mm hole ~3 mm from edge; 4–5 mm jump ring.
- Tube insert (advanced): embed a tiny tube during pour for a built-in channel.
Assembly checklist
- Polish both faces; degrease before glue application.
- Close jump rings by twisting past center for a gapless seam.
- Hang test on a bust—pendant should face forward and not roll.
Fine-tuning clarity: managing bubbles, haze, and edge artifacts
Most clarity issues are preventable with calm mixing and thin pours. If small bubbles appear under crystals, warm the surface lightly and tap the mold to release trapped air. For micro-haze, a final polish with a plastic-safe compound often restores shine.
Problem → fix table
| Issue | Likely cause | Fix now | Prevent next time |
|---|---|---|---|
| Bubbles around coil | Fast pour over coil | Warm air sweep; toothpick pop | Pre-wet coil with a veil of resin |
| Cloudy layer | Humid PU or cold epoxy | Warm post-cure, re-sand/polish | Condition bottles; stable room temp |
| Inclusion float | Poured too deep/too early | Wait to gel, re-seat | Build thinner layers; tack inclusions |
| Edge breakout | Pieces too near wall | Sand flush; polish | Keep 1–2 mm clearance |
Project recipes: three balanced orgonite pendant designs
Project 1 — Clear window round with centered copper spiral
- Size: Ø 30 mm × 6 mm.
- Layers: 1 mm clear → fine aluminum shavings → quartz chips → 12 mm copper spiral → clear cap.
- Hardware: drilled 2.0 mm hole; 5 mm jump ring; fine cable chain.
- Tip: pre-wet the spiral to prevent micro-bubbles along the wire.
Project 2 — Teardrop with gradient metal mix and crystal halo
- Size: 36 mm tall × 7 mm.
- Layers: base clear → graduated brass→copper shavings → quartz halo → clear cap.
- Hardware: glue-on bail; ensure flat, fully polished back.
- Tip: place crystals in a ring just inside the perimeter for a “halo” effect.
Project 3 — Hexagon “starlight” with minimal coil and central stone
- Size: 28 mm hex × 6 mm.
- Layers: thin clear → light copper shavings → single small cabochon or polished chip centered → tiny 10 mm coil → clear cap.
- Hardware: drilled hole; split ring for security.
- Tip: avoid sharp crystal points near corners; keep 2 mm from edges.
Care, wear, and maintenance
- Wipe with a soft microfiber after wear; avoid harsh solvents on resin surfaces.
- Store separately in a pouch to prevent micro-scratches.
- Inspect jump ring seams periodically; retighten if needed.
Practice drills to build consistency and speed
- Bubble control: pour five 1–2 mm base windows; practice warm-air sweeps until bubble-free.
- Coil centering: drop and tack ten spirals on gel layers; aim for ≤0.5 mm center deviation.
- Back flattening: wet-sand three cured blanks perfectly flat on a plate; check with a straightedge.
- Polish repeatability: run the 800→1500→3000→polish ladder on a scrap; keep as a reference swatch.
Start-to-finish summary checklist
- Prepare a ventilated workspace; lay out tools and PPE.
- Choose mold, size, and target thickness for comfortable wear.
- Wind a flat copper spiral; clean and dry metal shavings and crystal chips.
- Warm, measure, and slowly mix resin; rest to release bubbles.
- Pour thin base; gel; add metal; add crystals; seat coil; cap to height.
- Cure undisturbed; demold gently.
- Wet-sand back flat (600→1200); micro-bevel for comfort.
- Polish to clarity (2000→3000→compound).
- Attach bail or drill and ring; close seams cleanly; hang test.
- Wipe, photograph for your records, and store safely until wear.
