
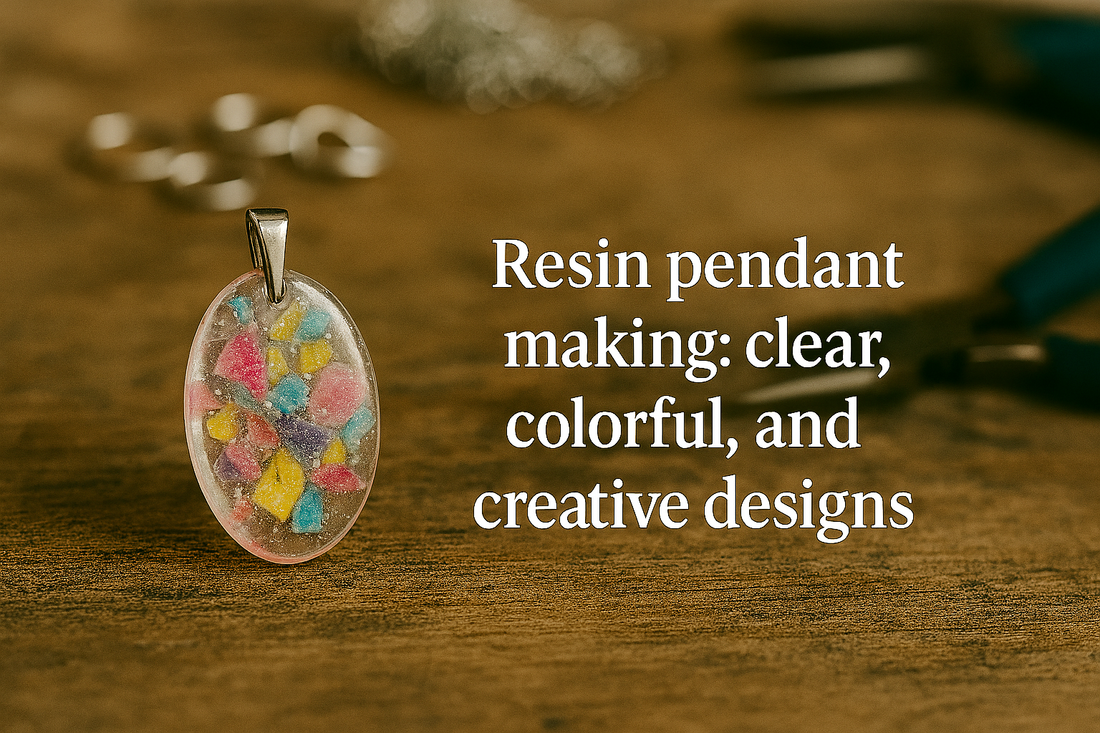
Resin pendant making: clear, colorful, and creative designs
This complete, step-by-step guide explains how to design comfortable pendant sizes, choose the right resin system, mix without micro-bubbles, add transparent dyes, mica, and alcohol inks, embed botanicals and metallic leaf cleanly, pour in thin layers for clarity, cure safely, demold without distortion, sand and polish to a glass finish, and attach low-profile hardware that hangs straight and feels good on skin. Eight inline diagrams show the exact bench setup, thickness planning, colorant compatibility, mixing and bubble control, layered pour maps, inclusion placement, finishing ladders, and bail options.
Safety, workspace prep, and resin selection
Work in a ventilated area, wear nitrile gloves, and follow the resin manufacturer’s guidance. Protect your surface with a silicone mat; keep a small bin for contaminated wipes. Choose a resin made for jewelry—low viscosity and crystal clarity are essential.
Resin types and when to use them
| Resin type | Pros | Watch-outs | Best for |
|---|---|---|---|
| Epoxy (1:1 or 2:1) | Low odor, long working time | May amber with UV; choose UV-stable | Clear, layered pendants, botanicals |
| PU (polyurethane) | Fast demold, excellent clarity | Humidity sensitive; short pot life | Quick batches, dyed translucents |
| UV resin | Cure on demand with lamp | Shallow pours only; can be brittle | Small charms, top coats |
Bench setup checklist
- Ventilation and PPE (respirator if recommended for your resin).
- Silicone mat with molds taped level; dust cover/box for curing.
- Digital scale; warmed, sealed resin bottles in a lukewarm bath.
Choosing pendant molds, sizes, and comfortable thickness
Comfort and visual balance come from smart proportions. Most people like 25–40 mm tall pieces at 5–8 mm thick. Teardrops and rounds hang well; hexagons look crisp but need careful demolding.
Size and thickness planning
| Shape | Typical size | Target thickness | Notes |
|---|---|---|---|
| Round | Ø 28–34 mm | 5–7 mm | Great for floating effects |
| Teardrop | 30–40 mm tall | 6–8 mm | Elegant; easy to center a bail |
| Hexagon | 25–32 mm | 5–7 mm | Edges chip if rushed out |
Colorants and effects: transparent dyes, alcohol inks, mica, and glitter
Each colorant behaves differently. Blend effects for depth: a transparent base, a translucent tint, pearlescent mica accents, and a restrained sparkle can read premium rather than busy.
Colorant compatibility quick guide
| Colorant | Optical effect | Mixing ratio | Watch-outs | Best use |
|---|---|---|---|---|
| Transparent dye | Glass-like tint | Drop-wise to taste | Too much = dark, slow cure | Windows, gradients |
| Alcohol ink | Petri & marble effects | Micro-drops | Can cause soft spots; seal with clear cap | Cloud blooms, veining |
| Mica powder | Pearl shimmer | Pinch per 10–20 g | Settles if heavy; swirl lightly | Highlights, depth bands |
| Fine glitter | Sparkle points | Dusting only | Clumps near walls if overused | Accent layers |
Mixing resin accurately: ratios, temperature, and pot life
Clarity starts at the cup. Warm bottles (sealed) in a lukewarm bath to lower viscosity. Weigh parts precisely. Stir slowly using a figure-eight motion while scraping sides and bottom for 2–3 minutes, then rest to let bubbles rise.
Mixing and timing sequence
- Warm sealed bottles 5–10 minutes; dry them off.
- Weigh parts to the gram; follow manufacturer ratio.
- Stir slowly; scrape walls; rest 2–3 minutes.
- Plan thin pours to stay within pot life; cover between steps.
Bubble control and surface levelling
Micro-bubbles hide in corners, around botanicals, and under ink blooms. Use a brief warm-air sweep (no open flame near alcohol inks), tap molds gently, and pre-wet inclusions with a veil of resin.
Bubble prevention do’s and don’ts
- Do pre-wet flowers and leaf before seating; they’ll outgas less.
- Do pour in thin 1–2 mm layers; resin degasses more easily.
- Don’t blast with a torch near inks—use warm air or a heat gun at a distance.
Layered pour strategies for clear, colorful resin pendants
Think in layers for consistent clarity. Use a clear “window” base, then build color and inclusions gradually so elements float rather than crowding the surface.
Layer-by-layer plan
- Base window (1–2 mm): degas, let gel to a soft-tack.
- Color veil: transparent dye or extremely thin mica wash.
- Inclusions seat: pre-wet, place botanicals/leaf; press gently.
- Effect pass (optional): alcohol ink micro-drops for blooms; allow diffusion.
- Cap layer: fill to height; level with warm air.
Embedding botanicals, metallic leaf, and small charms
Dry inclusions thoroughly. Press botanicals onto a gel stage so they don’t float. Break gold/silver leaf into tiny flakes; press them flat to avoid creases telegraphing to the surface.
Placement tips
- Keep inclusions 1–2 mm away from mold walls and top surface.
- Use tweezers and a toothpick to nudge edges flat before capping.
- Test composition on paper first; symmetry helps pendants hang visually centered.
Curing schedules, demolding, and back-face refinement
Follow your resin’s cure times strictly. Cover molds to keep dust out. When firm, flex the silicone gently to break the seal, then peel back slowly. Flatten the back on wet sandpaper atop a glass plate.
Typical cure timeline (example)
| Stage | Epoxy (1:1) | PU | Notes |
|---|---|---|---|
| Working time | 25–45 min | 10–20 min | Plan thin stacks |
| Gel for layering | 30–90 min | 8–12 min | Touch with toothpick corner only |
| Demold | 12–24 h | 1–3 h | Leave longer for thick pours |
| Full cure | 48–72 h | 24 h | Polish after full cure |
Sanding and polishing to a glass-like finish
Wet-sand in a disciplined grit ladder, then polish with a plastic-safe compound. Keep the piece moving in straight strokes; rinse slurry between grits to avoid re-scratching.
Finishing ladder and goals
| Stage | Grit / tool | Goal | Tip |
|---|---|---|---|
| Level | 600–800 | Flatten back, remove mold seam | Use a hard plate under paper |
| Refine | 1000–1500 | Close scratches | Rinse often |
| Pre-polish | 2000–3000 | Silky sheen | Light pressure |
| Polish | Plastic polish / compound | Glass clarity | Soft pad, low RPM by hand |
Drilling, attaching bails, and clean hardware assembly
Choose a hardware method that matches your look and tools: glue-on bails for flat backs, drilled holes with jump rings for a minimal profile, or embedded tubes for a floating effect. Degrease before gluing; back the exit face when drilling to prevent chips.
Hardware options and sizing
| Method | Hole/bail size | Ring gauge | Notes |
|---|---|---|---|
| Glue-on bail | Flat pad 6–10 mm | 4–5 mm ring, 20–22 ga | Minimal adhesive; full cure before wear |
| Drilled-through | 1.8–2.5 mm hole ~3 mm from edge | 5 mm ring, 20 ga | Back exit face; deburr both sides |
| Embedded tube | ID ~2.0–2.5 mm | — | Seat during pour; align perfectly |
Advanced coloring techniques: controlled blooms and lacing
Alcohol ink “petri” techniques create organic clouds; lacing uses a dense white to create web-like lines under a translucent color. Always cap with clear resin after effects settle.
Petri and lacing sequence
- Color the mid-layer lightly with translucent dye.
- Add micro-drops of ink; wait 10–30 seconds for diffusion.
- Add a tiny white drop to push a bloom; stop early—overworking muddies color.
- Cap with clear after the motion slows; avoid torches near alcohol.
Common errors
- Too many ink drops → muddy results; use fewer, spaced apart.
- Thick layers → trapped bubbles; keep each pour thin and patient.
Troubleshooting for clear, colorful resin pendants
| Problem | Likely cause | Fix now | Prevent next time |
|---|---|---|---|
| Tacky surface | Off-ratio or cold cure | Warm post-cure; re-sand and repolish | Weigh precisely; condition bottles |
| Cloudy layer | Humidity (PU) or over-mixing air | Warm air pass; polish ladder | Slow stir; control humidity |
| Bubbles under petals | Unsealed botanicals; steep pour | Toothpick release; gentle heat | Pre-wet inclusions; thinner layers |
| Edge breakout | Leaf/flowers near wall | Sand flush; re-cap thinly | Keep 1–2 mm clearance |
| Yellowing over time | Low UV resistance | — | Choose UV-stable resin; store away from sun |
Project recipe A — Clear window round with botanical halo
Specs
- Ø 32 mm × 6 mm; epoxy resin.
- Base 1.5 mm clear → translucent teal veil → pressed baby’s breath halo → clear cap.
- Drilled 2.0 mm at 3 mm from edge; 5 mm jump ring.
Steps
- Base pour; warm-air; gel to soft tack.
- Veil with transparent teal (very light); rest 5 minutes.
- Pre-wet tiny petals; arrange ring just inside the perimeter.
- Cap to height; cover; cure 18–24 hours; demold; finish.
Project recipe B — Teardrop mica shimmer with gold leaf accents
Specs
- 36 mm teardrop × 7 mm; epoxy or PU.
- Base 1 mm → ultra-thin pearl mica wash → micro-flakes of gold leaf pressed flat → clear cap.
- Glue-on bail centered on back (degrease + minimal adhesive).
Steps
- Base; gel; swirl a faint mica wash (pinch per 20 g).
- Press leaf pieces; avoid edges; seal with a thin veil.
- Cap; cure; polish to mirror clarity.
Project recipe C — Hexagon ink bloom with translucent gradient
Specs
- 28 mm hex × 6 mm; epoxy.
- Base clear → gradient dye (bottom darker) → three micro-drops alcohol ink + one tiny white → clear cap.
- Drilled hole; split ring for security.
Steps
- Pour base; rest; add gradient with a pipette.
- Drop ink sparsely; wait 20 seconds; add micro white at centers.
- When motion slows, cap; cure fully before sanding/polish.
Practice drills to build consistency
- Bubble control: pour five 1–2 mm windows and practice warm-air sweeps until consistently bubble-free.
- Color discipline: create a swatch card of dye strengths (1–5 drops per 20 g) to learn thresholds.
- Inclusion spacing: dry-run botanical halos on paper, then replicate in resin within a 1–2 mm border.
- Finishing: run the 800→1500→3000→polish ladder on a scrap blank; keep as a reference.
Start-to-finish checklist
- Prepare a ventilated bench; lay out PPE, level molds, dust cover.
- Choose size/shape (round/teardrop/hex) and target thickness (5–8 mm).
- Warm sealed bottles; weigh precisely; stir slowly; rest.
- Pour base window; gel; plan color and inclusion positions.
- Apply translucent veils and effects sparingly; pre-wet inclusions.
- Stack layers thinly; use warm air and tapping to release bubbles.
- Cure covered; demold gently; wet-sand back on a flat plate.
- Polish to clarity; drill or glue bail; close rings cleanly.
- Hang test for face-forward wear; wipe and store separately.
