
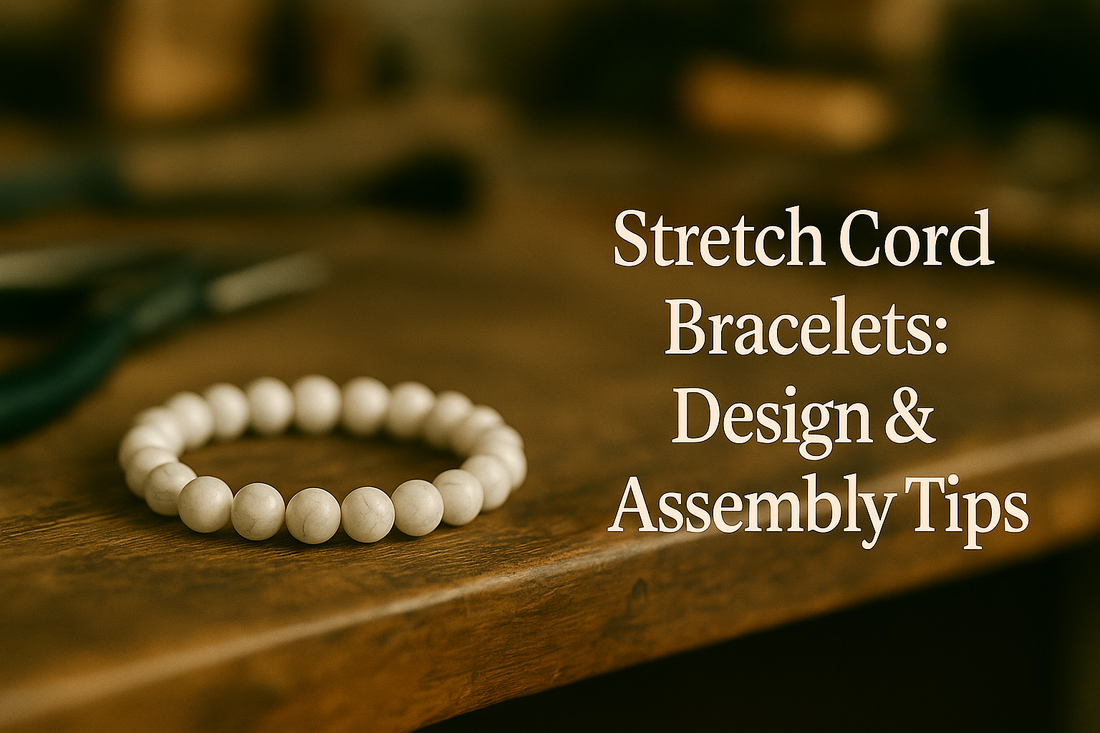
Using elastic cord to make durable bracelets
This tutorial explains how to make elastic cord bracelets that don’t break, using proven knotting methods, bead selection strategies, and durability boosters.
You’ll learn how to choose the right elastic, size accurately, tie secure knots, hide them cleanly, and finish with professional touches that withstand daily wear.
Tools and materials for strong stretch bracelets
Choosing quality supplies is the easiest way to boost durability. A few thoughtful upgrades (proper elastic thickness, bead hole compatibility, flexible needle) make your bracelet more resilient without adding complexity.
Shopping checklist: what to gather
- Elastic cord (0.5–1.0 mm; brands like “Stretch Magic”, “Elasticity”, or braided options)
- Beads (glass, gemstone, wood, polymer; check hole sizes and smooth interiors)
- Bead stopper or binder clip (prevents accidental unstringing)
- Beading needle (collapsible eye, big-eye, or dental floss threader)
- Scissors or flush cutters (sharp blades reduce frayed ends)
- Jewelry glue (G-S Hypo Cement or tiny drop of flexible clear adhesive; avoid brittle super glues)
- Calipers or ruler and flexible tape measure (for precise sizing)
- Crimp covers or large-hole bead to hide knots (optional but professional)
Choosing the best elastic cord diameter and type
Picking the right elastic is the foundation of a bracelet that stays snug and resists snapping. The sweet spot balances bead weight, hole diameter, and desired stretch recovery.
Elastic cord comparison: monofilament vs braided
| Elastic type | Pros | Cons | Best for |
|---|---|---|---|
| Monofilament (single strand) | Clear, affordable, easy to find, good memory | Can kink if overstretched; knot security depends on technique | Light to medium beads; beginners |
| Braided/fabric-covered | Excellent flexibility, high abrasion resistance, softer drape | Usually opaque; slightly thicker for same strength; costlier | Gemstones, heavier beads, everyday wear |
Diameter guide for bead sizes
- 0.5 mm: seed beads, 4–6 mm glass; tiny holes
- 0.7 mm: 6–8 mm general purpose; most projects
- 0.8–1.0 mm: 8–10 mm gemstones, wood, heavier bracelets
- Double-stranding: when holes are large or bracelet bears weight (e.g., lava stone)
Pro tip: If a single strand slides through bead holes with wiggle room, size up or use two strands. The cord should fill about 70–85% of the hole to reduce friction and knot slippage.
Accurate sizing: measure, plan spacing, and calculate string length
Fit determines comfort and longevity. Too tight overstretches the elastic; too loose snags and stresses the knot.
How to measure a wrist for a stretch bracelet
- Wrap a flexible tape around the wrist bone; note the exact circumference.
- Choose fit: snug add 0–0.5 cm, classic add 0.5–1 cm, loose add 1–1.5 cm.
- For heavy beads, add a bit more to keep drape comfortable.
Quick sizing reference
| Wrist size | Bracelet inner circumference (classic fit) | Notes |
|---|---|---|
| 14–15 cm | 14.5–16 cm | Fine elastic, small beads |
| 16–17 cm | 16.5–18 cm | Standard adult sizing |
| 18–19 cm | 18.5–20 cm | Use 0.7–0.8 mm elastic |
Cord length rule of thumb: cut cord at wrist size + 20–25 cm to allow for knotting and handling. For double-strand builds, cut two equal lengths.
Preparation that prevents breakage
Simple prep steps dramatically improve longevity. Think of them as insurance against frayed ends and loose knots.
Pre-stretch and condition the elastic
- Cut your length and gently pre-stretch the cord by pulling 5–8 cm sections along the entire piece. This removes initial creep so the finished bracelet doesn’t grow after the first wear.
- Run the cord through clean fingers or a lint-free cloth to remove manufacturing residue.
- If using braided elastic, check for uneven spots or nicks and trim past them.
Prepare your beads
- Inspect holes for sharp edges; ream lightly if needed (diamond bead reamer) to prevent cutting the elastic.
- Group beads by hole size to keep tension consistent.
- Design a focal area with a large-hole bead or a knot cover where the final knot will hide.
Stringing techniques for smooth, even tension
Consistent tension reduces chafing at the holes and keeps the bracelet round instead of lumpy. Avoid micro-stretching while you string.
Method A: single-strand with big-eye needle
- Thread the elastic through a big-eye needle; clamp a bead stopper 10 cm from the tail.
- String beads in your planned order, occasionally sliding them down to the stopper without pulling tight.
- Stop when the bead row matches your target circumference minus about one bead’s width for knot space.
Method B: double-strand for heavy beads
- Cut two cords and pre-stretch both. Tape or clip their ends together.
- Use beads with larger holes (≥1.2 mm). String beads over both cords.
- Keep the cords parallel and flat as you string to avoid twisting that can abrade inside the holes.
Tip for uniformity: After every 5–7 beads, gently compress the strand between your palms to settle spacing. This avoids hidden gaps that later force the knot to carry extra load.
Tying secure knots that don’t slip: surgeon’s knot and square knot
The knot is the bracelet’s weak link—make it strong, compact, and properly seated. These two knots have the best balance of security and size for elastic cord.
How to tie a surgeon’s knot (recommended for most elastics)
- Cross the right tail over the left to begin a simple overhand knot.
- Wrap the right tail through the loop twice (this extra pass adds friction).
- Moisten lightly, then snug slowly by pulling both standing parts while pushing beads toward the knot to remove slack without overstretching.
- Add a locking half-hitch on each tail around the opposite strand for redundancy.
How to tie a square knot (reef knot) correctly
- Left over right and pull, then right over left and pull (or vice versa). Avoid “granny knots.”
- Seat the knot by alternately tightening each side while keeping the bead line relaxed.
- Finish with a surgeon’s half-hitch on one tail if using slick monofilament elastic.
Knot sizing trick: Position the knot next to a bead with a slightly larger hole. After gluing and trimming, you can slide the knot into this bead to hide and protect it.
Reinforcing and finishing: glue, trimming, and hiding the knot
Minimal adhesive plus good knotting beats drowning the knot in glue. Too much glue makes elastics brittle.
Choosing the right adhesive for elastic cord
| Adhesive | Strength | Flexibility | Best use | Notes |
|---|---|---|---|---|
| G-S Hypo Cement | High | Good | Surgeon’s knot sealing | Precision needle tip prevents mess |
| Flexible clear craft glue | Medium | High | Braided elastic | Allow full cure (12–24h) |
| Thin cyanoacrylate (super glue) | Very high | Poor | Not recommended | Can embrittle and cloud beads |
Finishing steps that add years to your bracelet
- Apply a tiny dot of adhesive directly on the knot. Avoid saturating the cord.
- Wait 2–5 minutes until tacky; trim tails to 2–3 mm with sharp cutters.
- Slide the knot into a knot-hiding bead or close a crimp cover around it (gently, no crushing).
- Lay the bracelet flat for several hours to fully cure before stretching.
Step-by-step project: durable gemstone elastic bracelet
Use this workflow to build a robust bracelet with 8 mm gemstones and a hidden knot. It’s optimized for everyday wear.
Materials for this build
- 0.8 mm braided elastic, 60 cm
- 8 mm round gemstones, ~23–25 pieces for a 17 cm wrist
- 1 large-hole bead (10–12 mm) or 4 mm crimp cover
- Big-eye needle, bead stopper, precision glue
Process
- Measure & cut: Target inner circumference 17.5 cm; cut elastic 60 cm for handling.
- Pre-stretch: Condition the cord in sections to remove initial slack.
- String: Add beads, placing the large-hole bead opposite the planned knot position.
- Test fit: Form a circle without knotting; check drape and spacing. Add/remove a bead as needed.
- Knot: Tie a surgeon’s knot; add two locking half-hitches. Seat gently.
- Glue & trim: Dot of G-S Hypo; trim to 2–3 mm.
- Hide: Pull knot into the large-hole bead or close a crimp cover.
- Cure: Rest flat 12 hours before first stretch test.
Durability checklist and stress-testing routine
Before gifting or selling, perform quick tests to catch weak spots. A few controlled stretches reveal issues safely.
Five quick tests
- Circle compression: Compress the bracelet flat and release—beads should settle without gaps.
- Gentle stretch: Stretch 2–3 cm beyond rest length five times; watch the knot area.
- Spin test: Rotate beads around the cord; excessive spinning indicates holes too large.
- Knot inspection: Look for fraying, whitening (stress), or adhesive cracking.
- Wear simulation: Slide on/off your hand 10 times; listen for creaks (abrasion) and recheck tension.
Common mistakes and how to fix them
Most breakages trace back to four issues: undersized elastic, sharp bead holes, rushed knots, and over-gluing. Use this troubleshooting map.
| Problem | Likely cause | Quick fix | Prevention |
|---|---|---|---|
| Bracelet loosens after a day | No pre-stretch; heavy beads | Retie and remove 1 bead | Pre-stretch; size up elastic |
| Knot slips open | Granny knot; slick cord | Use surgeon’s + half-hitches | Practice square/surgeon’s knots |
| Elastic frays near a bead | Sharp hole edges; abrasion | Ream or replace bead | Inspect and ream in advance |
| Cloudy beads near knot | Super glue fumes | Replace affected beads | Use flexible jewelry cement |
| Knot too bulky to hide | Too many wraps or thick cord | Switch to large-hole bead | Plan hiding spot in the design |
Design strategies that reduce stress on the cord
A durable bracelet isn’t only about the knot; the design itself should minimize friction and concentrate strength where it matters.
Smart spacing and bead choices
- Alternate heavy and light beads to distribute weight evenly around the circle.
- Use smooth spacers (heishi, rondelles) near the knot to reduce edge abrasion.
- Favor rounded hole edges (glass, polymer, well-finished gemstones) over rough ceramic.
Strategic placement of the knot
- Place the knot under the wrist where it experiences fewer bumps.
- A feature bead with a larger bore opposite a heavy focal lets you hide and protect the knot.
- For stacks, stagger each bracelet’s knot location to avoid bulk in one spot.
Advanced techniques for extra-strong elastic bracelets
When making bracelets for kids, workouts, or markets, add redundancy and abrasion protection without sacrificing style.
Double-back threading (loop-through lock)
- After stringing, run one tail back through 3–4 beads before knotting.
- This creates a friction lock so the knot carries less load.
- Tie the surgeon’s knot, glue, trim; the re-threaded path hides the tails naturally.
Hybrid cord approach
- For a heavy focal bead, thread that section on a thin stainless cable with crimp tubes, then connect to elastic sections on each side.
- The focal area bears weight on cable; the rest stretches comfortably.
Heat-shrink tubing protector (invisible guard)
- Slide a 3–4 mm clear heat-shrink segment over the knot area (before knotting).
- Tie and glue the knot; once cured, gently warm to shrink—do not overheat.
- Cover with a bead or leave discreetly clear.
Step-by-step: hiding knots for a professional, seamless look
Clean finishes boost perceived quality and reduce snagging. These two methods work with most designs.
Method 1: large-hole bead hide
- Position a bead with a 2–3× larger bore next to the knot location.
- After gluing and trimming, gently pull the knot into the cavity with your needle.
- Seat the knot by pushing beads together; avoid yanking.
Method 2: crimp cover shell
- Choose a cover slightly larger than the knot diameter.
- Place over the knot and close slowly with chain-nose pliers, forming a round “bead.”
- Check that the cover edges are flush to prevent fabric snagging.
What is the best elastic cord size for gemstone bracelets?
For 8 mm gemstones, 0.7–0.8 mm offers the best balance of strength and bead-hole fit. Large or heavy beads may need 1.0 mm or double-stranding.
Which knot is most secure for elastic cord?
The surgeon’s knot with two locking half-hitches is the most reliable for slick monofilament and braided cords. Seat the knot gently, glue sparingly, and hide it in a large-hole bead.
How do I stop my bracelet from loosening over time?
Pre-stretch the cord, size the bracelet correctly, and avoid micro-stretching while stringing. Periodic gentle compression realigns beads and preserves tension.
Can I use super glue on elastic?
Thin cyanoacrylate can embrittle elastic and fog nearby beads. Choose flexible jewelry cement and use the tiniest dot for long-lasting results.
Printable quick-reference: elastic bracelet best practices
| Step | Action | Key detail | Why it matters |
|---|---|---|---|
| 1 | Select elastic | 0.7–0.8 mm for most 6–8 mm beads | Prevents snap, fits common holes |
| 2 | Pre-stretch | Stretch cord in small sections | Eliminates early loosening |
| 3 | String smart | Even tension; plan knot hide | Less abrasion and bulk |
| 4 | Knot | Surgeon’s + half-hitches | High friction, low slippage |
| 5 | Glue | Tiny dot of flexible cement | Seals without embrittlement |
| 6 | Hide & cure | Large-hole bead or cover; rest flat | Protection and clean finish |
